How to Set Up Your Spa in SpaSphere (Quick Start)
Get up and running with SpaSphere in under 10 minutes. Create your account, add services, and start accepting bookings.
7 min read

Welcome to SpaSphere! This guide walks you through the essential setup steps so you can start managing your spa business right away. Whether you are opening a brand-new studio or migrating from paper schedules and spreadsheets, you will have online booking live in under 10 minutes.
When you first log in, your dashboard shows a Getting Started task list -- a checklist of everything you need to complete before your spa is fully operational. Each task links directly to the relevant settings page, so you never have to search for where to go next.

Why This Matters for Your Spa
Every day without online booking costs you revenue. Industry data shows that spas offering 24/7 online scheduling see 25-40% more bookings than those relying on phone-only intake, because clients book when it is convenient for them -- often late at night or early in the morning. Getting set up quickly also means fewer missed opportunities during your first week on the platform. SpaSphere's guided setup ensures your service menu, availability, and payment processing are configured correctly from the start, so your first client experience is seamless. The faster you go live, the sooner you recoup your investment and start building a digital client base that drives repeat visits and long-term retention.
What You'll Set Up
- Your business profile and hours
- Your service menu with pricing
- Online booking for clients
- Payment processing via Stripe
- Your booking website (with optional custom domain)
The dashboard task list tracks your progress through each of these steps. As you complete each one, the task checks off and your spa gets closer to fully operational.
Before you begin
You'll need your business name, a list of services you offer, and a Stripe account (or we'll help you create one during setup). Having this information ready cuts setup time in half and ensures your booking page is accurate from day one.
Step-by-Step Setup
Create your account
Visit spasphere.ai/get-started and sign up with your Google account. You'll be guided through a short onboarding wizard that collects your business name, address, and timezone.
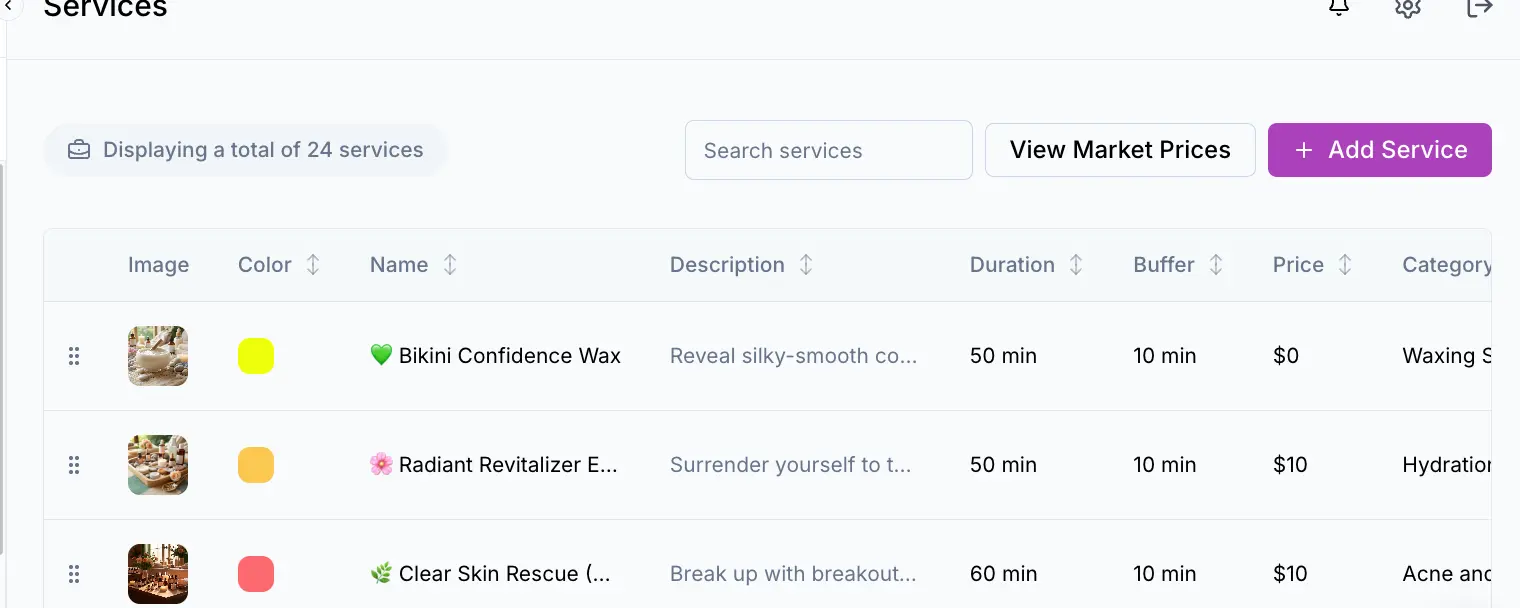
Add your services
Navigate to Services in the sidebar and click Add Service. Enter the service name, duration, and price. You can organize services into categories like Facials, Waxing, or Body Treatments.
Set your availability
Go to Settings -> Business Hours to configure your working days and hours. SpaSphere uses these to show available time slots on your booking page.
Connect payments
Under Settings -> Payments, click Connect Stripe to link your Stripe account. Once connected, you can accept credit card payments for appointments and sell products through your online store.
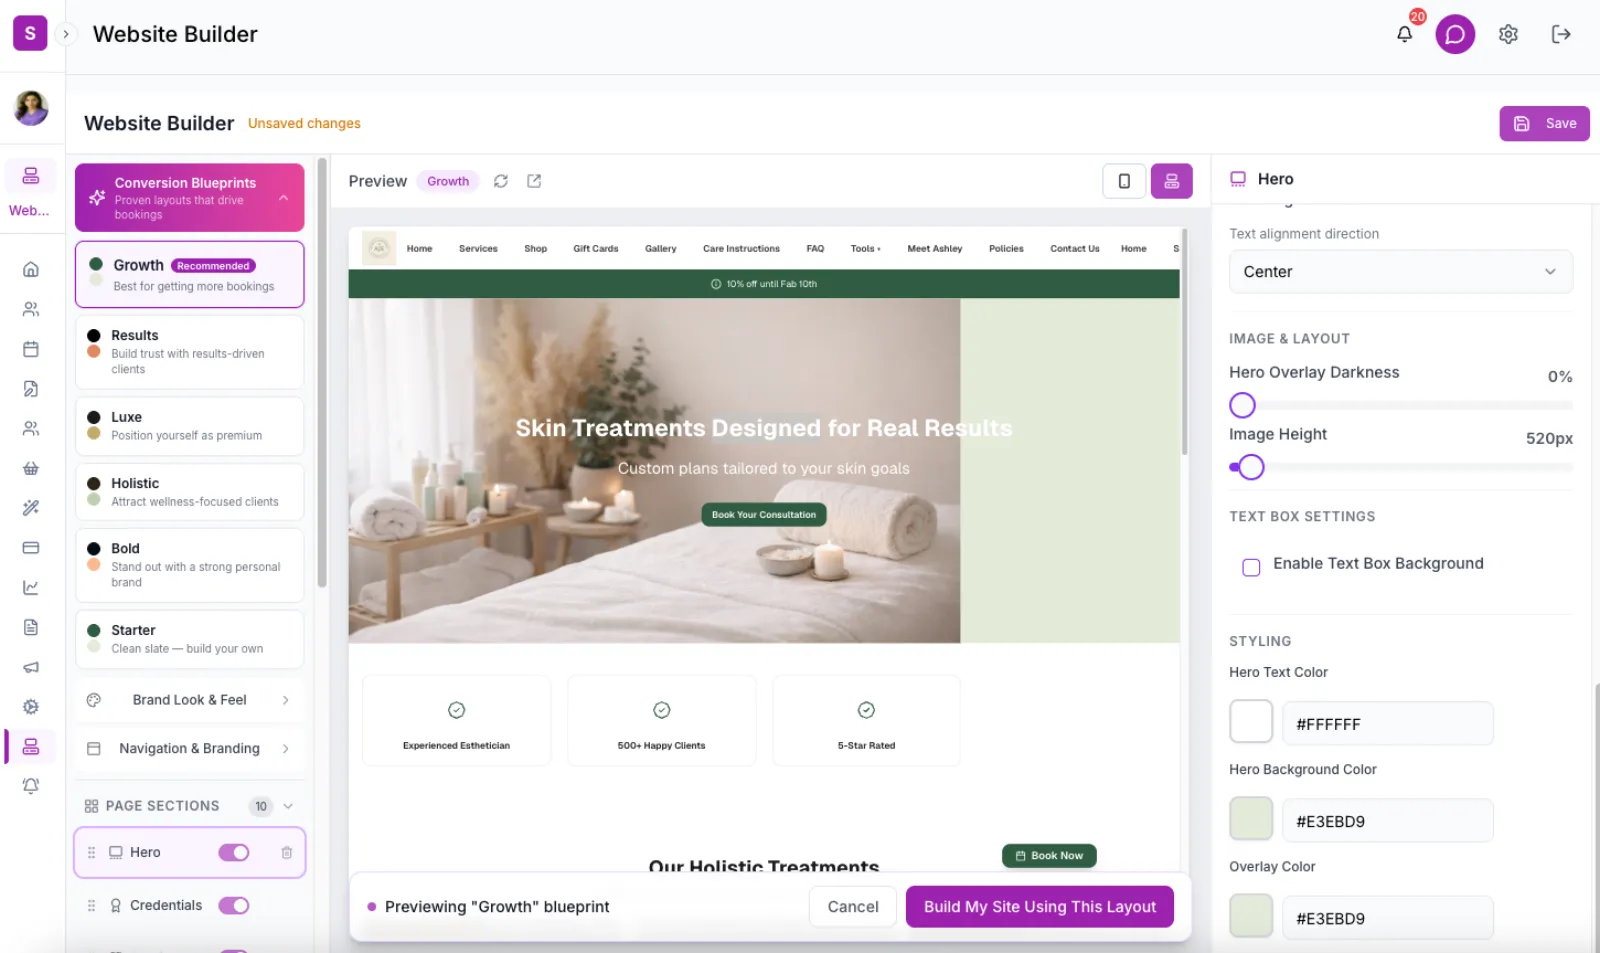
Set up your website
Click Website in the sidebar to open the website builder. Your booking site is already live at yourbusiness.myspa.ai with your services and availability. From here you can:
- Set your website title and description for SEO
- Enable pages like Gallery, About Us, FAQ, and Policies
- Upload your logo and set brand colors in the Theme tab
- Add social media links
- Choose a homepage blueprint from 6 proven layouts
Connect your own domain (recommended)
SpaSphere is the only esthetician platform that lets you connect your own domain. Open the in-app chat (the purple chat icon in the top-right corner) and tell us the domain you want to use (e.g., yourspa.com). You'll add two CNAME records pointing to public.spasphere.ai, and our team handles SSL and activation. Full instructions are in our custom domain guide.
If you don't have a domain yet, your site works perfectly at yourbusiness.myspa.ai. You can connect a custom domain at any time later.
Share your booking link
Your public booking page is live at yourbusiness.myspa.ai (or yourspa.com if you connected a custom domain). Share this link on your Instagram bio, Google Business Profile, and email signature so clients can book 24/7.
Start with your highest-revenue services
Add your top 3-5 most popular services first. These are the services that drive most of your bookings and revenue. You can always add more later, but starting with your best sellers means you capture revenue from the moment you go live rather than waiting until every service is listed.
What's Next?
Now that you're set up, explore these areas to get the most out of SpaSphere:
- Connect Your Custom Domain -- Own your SEO and your brand with your own domain (the biggest advantage you can set up today)
- Customize Your Website -- Enable pages, add social links, set up analytics tracking, and build your homepage
- Client Management -- Import your existing clients or let SpaSphere create profiles automatically when clients book
- Intake Forms -- Create digital intake forms that clients fill out before their appointment
- Email Reminders -- SpaSphere automatically sends appointment reminders to reduce no-shows
Don't forget
Make sure to verify your email address in Settings to ensure appointment notifications are delivered to your inbox. Without verified email, your clients will not receive booking confirmations or reminders, which can lead to no-shows and lost revenue.
Frequently Asked Questions
Related Documentation
Ready to try this in your spa?
$1 for 30 days. No contracts. We migrate everything for you.