How to Create Spa Intake Forms in SpaSphere
Build custom digital intake forms that clients complete before their appointment using the drag-and-drop form builder.
8 min read
SpaSphere's intake forms let you collect important client information before each appointment -- from medical history and allergies to service preferences and consent agreements. You can build and manage all your forms directly from the SpaSphere dashboard.
Why This Matters for Your Spa
Digital intake forms are not just a convenience -- they are a frontline tool for client safety, legal protection, and operational efficiency. Collecting medical history, allergies, and medication details before a treatment begins lets your providers screen for contraindications that could cause allergic reactions or adverse outcomes during chemical peels, laser treatments, or injectables. Documented consent forms and signed waivers reduce your legal exposure; the average cost of defending a single personal injury claim in the aesthetics industry can exceed $50,000 even when the claim is dismissed. When clients complete forms online before arriving, you eliminate 10-15 minutes of waiting room paperwork per appointment, which translates to smoother scheduling and more capacity during peak hours. Finally, a polished digital intake experience signals to clients that your practice is modern, organized, and serious about their wellbeing -- setting the tone for the entire visit.
Key Capabilities
- Drag-and-drop form builder with seven different element types for any question format
- Required field toggles to ensure clients provide essential information
- Frequency control so forms are collected every visit or just once per year
- Live preview to see exactly how your form appears to clients
- Active/inactive toggle to temporarily hide forms without deleting them
- Reusable sections that you can share across multiple forms to avoid duplicating common questions
Building Your First Intake Form
Open the Forms page
Click Forms in the left sidebar of your dashboard. You will land on the Intake Forms tab, which lists all your existing forms along with their name, description, and active status.

Start a new form
Click the Add Intake Form button in the top-right corner. The form builder opens with a sidebar on the left for settings and a main canvas on the right where you will add your form elements.
Configure form settings
In the Form Settings panel on the left, fill in:
- Form name (required) -- a descriptive title such as "New Client Health Questionnaire" or "Facial Treatment Consent"
- Description (optional) -- a brief note for your team about what this form covers
- Form Status -- toggle the switch to make the form active or inactive

Choose a frequency
In the Frequency panel, select how often clients should fill out this form:
- Every visit -- the client completes the form before each appointment. Best for treatment-specific consent or session notes.
- Once per year -- the client fills it out once, and it is not requested again for 12 months. Ideal for medical history and general intake questionnaires.
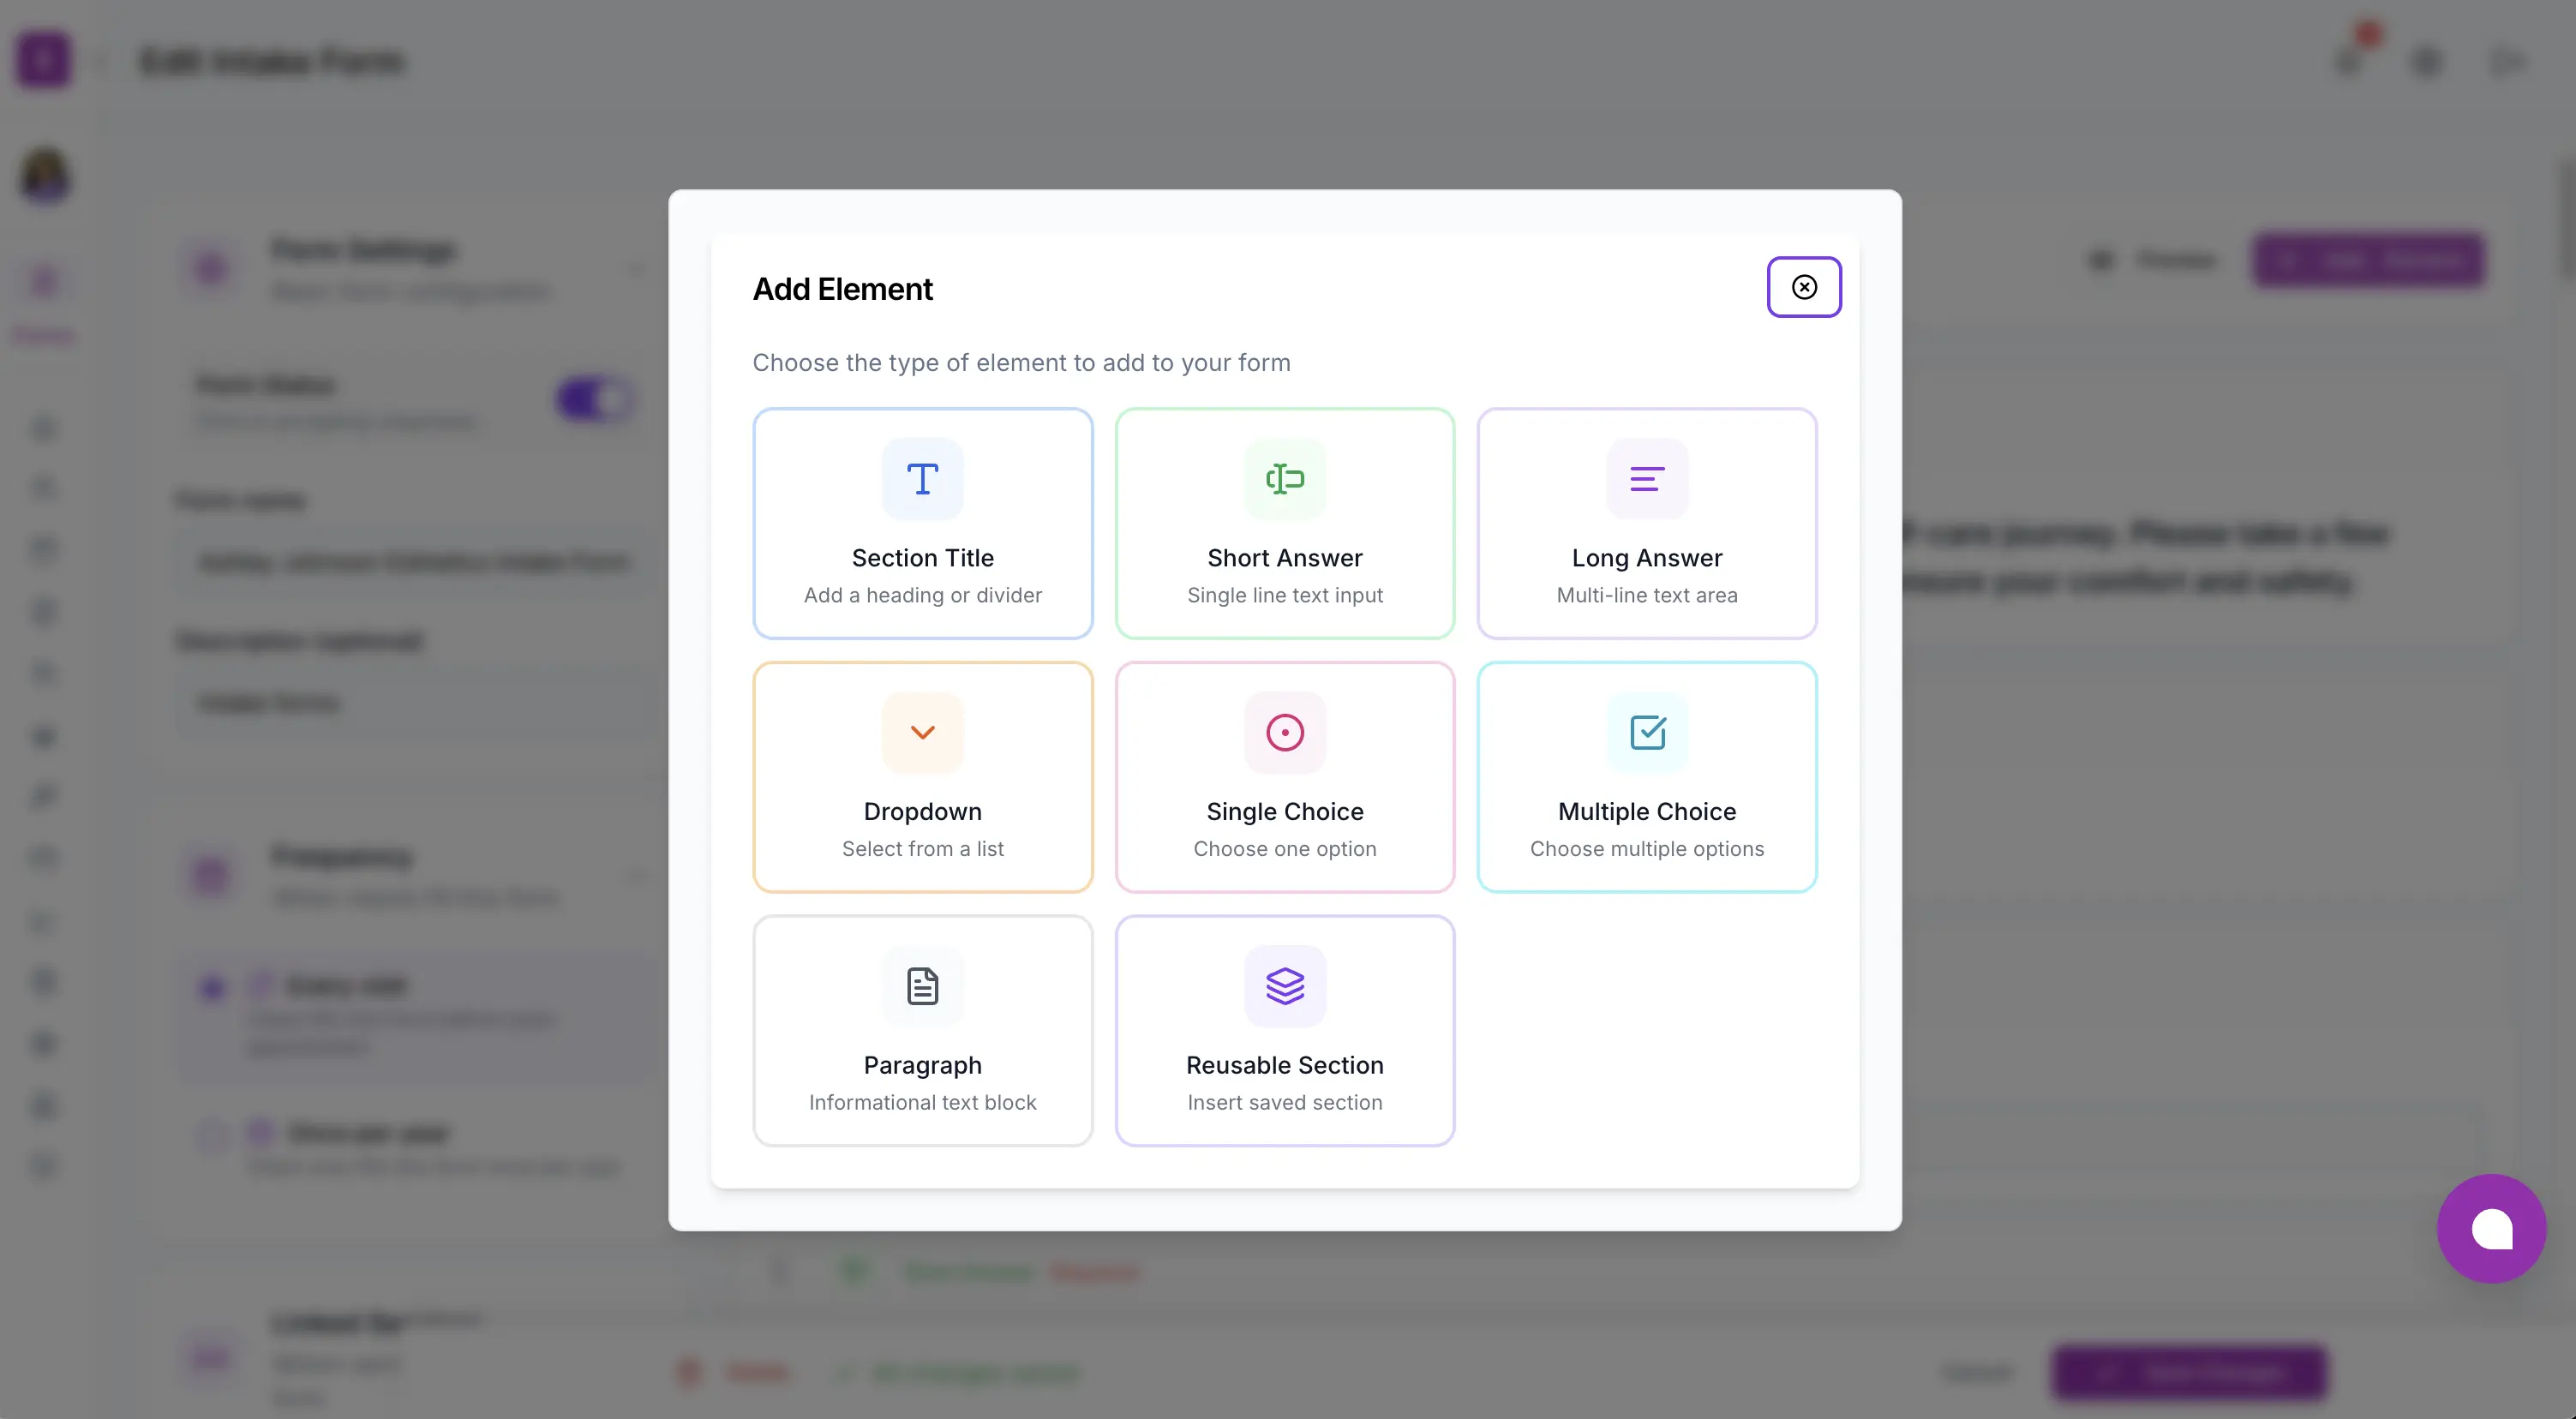
Add form elements
Click the Add Element button above the canvas. A modal appears showing all available element types in a visual grid. Pick the type you need, configure its label, placeholder, and options, then click Add Element to insert it into the form.
You can add as many elements as you need. Each element appears as a card on the canvas with a drag handle, type badge, and edit/delete controls.

Reorder elements with drag and drop
Grab the drag handle on any element card and move it to a new position. The form builder uses smooth drag-and-drop reordering so you can arrange your questions in the most logical flow for clients.
Preview your form
Click the Preview button in the toolbar to see how your form will appear to clients. The preview renders all fields, labels, required indicators, and option lists exactly as clients will see them. Switch back to edit mode by clicking Edit.

Save your form
Click Create Form at the bottom of the page. If you have not linked any services yet, SpaSphere will show a confirmation dialog asking if you want to save the form without service links or link services first. You can always add service links later.
Start with a reusable section for medical history and allergies
If you ask the same set of questions on multiple forms -- such as emergency contact details, allergy information, or current medications -- create a reusable section first under the Reusable Sections tab. Reusable sections let you maintain a single source of truth for these critical screening questions. Update the section once and every form that uses it gets the change automatically, which is essential for staying compliant with evolving health screening requirements and ensuring no provider works from outdated intake data.
Editing and Deleting Forms
To edit an existing form, click its row in the Intake Forms table. The form builder opens with all your existing elements loaded. Make your changes and click Save Changes. SpaSphere tracks whether you have made any modifications and only enables the save button when there are unsaved changes.
To delete a form, open it in edit mode and click the Delete button. A confirmation dialog will ask you to confirm before the form is permanently removed.
Deleting removes the form from all linked services
When you delete an intake form, it is removed from all linked services and clients will no longer be prompted to complete it during booking. Existing client submissions for that form are preserved on client profiles so you retain your records, but no new submissions can be collected. Before deleting, consider deactivating the form instead -- this hides it from clients while preserving the ability to reactivate it later if your compliance or service requirements change.
Viewing Client Submissions
After a client completes an intake form, you can view their submission from their client profile. Navigate to Clients, open the client's profile, and select the Intake Forms tab. Each submission shows the form name and submission date. Click any row to see the full set of responses.

Frequently Asked Questions
Related Documentation
Ready to try this in your spa?
$1 for 30 days. No contracts. We migrate everything for you.